

loading

Our Blog

Check out our innovative pump solutions and industry insights to see what's new in the pumping industry. Stay up to date with the latest trends and news in the world of pumping technology by following our pumping technology blog.

Why Is My Air Conditioner Contactor Not Working?

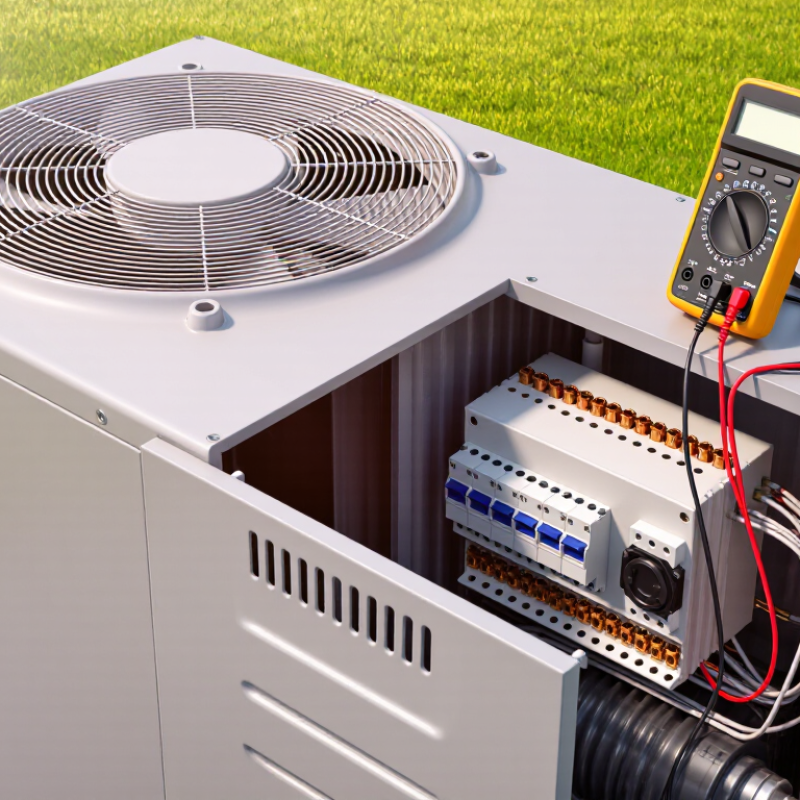
When an outdoor air conditioner refuses to start, the Air Conditioner Contactor is often one of the first components worth inspecting. This small electrical switch connects high-voltage power to the compressor and condenser fan. It may look simple, but its failure can stop the entire cooling system.

HVAC educator and technician Bryan Orr offers a practical reminder: “A contactor is a switch controlled by a low-voltage signal.” That signal usually comes from the thermostat through the control circuit. If the coil receives the correct voltage, the contactor should pull in with a firm click. No click often indicates a failed coil, broken wire, weak transformer, safety-control interruption, or thermostat problem. A contactor that clicks but does not deliver power may have burned, pitted, or badly worn contacts.

The symptoms can be quite specific. You may hear humming near the outdoor unit, see the fan remain still, or notice the compressor never starts. Sometimes ants, dust, or moisture interfere with the contact points. Real systems are less tidy. A loose terminal can resemble a failed contactor, while low control voltage can create confusing results. This guide examines why an Air Conditioner Contactor may not be working and explains safer diagnostic steps. It also considers when replacement is reasonable and when a licensed HVAC professional should take over. Do not guess around live voltage. One careful measurement is better than repeated resets. A perfect diagnosis is rarely obvious at first glance.
Why Is My Air Conditioner Contactor Not Working?

What an AC Contactor Does: 24-Volt Control and 208–240-Volt Power Paths

Why Is My Air Conditioner Contactor Not Working?

An AC contactor separates two circuits. The thermostat sends approximately 24 volts to the coil. That coil pulls a metal bar downward, connecting the 208–240-volt power path to the compressor and outdoor fan. The control side is small. The load side is dangerous. A multimeter may show 24 volts, yet the contactor can still fail mechanically. Burned contacts, a weak coil, loose wires, or insects inside the cabinet can stop operation. I have seen a contactor click without delivering stable voltage. That sound can mislead you.

The U.S. Energy Information Administration’s 2020 Residential Energy Consumption Survey found air conditioning served about 89% of American homes. It also accounted for roughly 19% of residential electricity use. The International Energy Agency’s Future of Cooling report projects global cooling demand could more than triple by 2050. Small switching faults therefore deserve careful attention.

If the coil receives no 24 volts, inspect the thermostat circuit, low-voltage fuse, safety float switch, transformer, and wiring. If 24 volts reaches the coil but the contacts remain open, the contactor is likely defective. Measure voltage across the correct terminals, not casually across the cabinet.

A 208–240-volt reading can cause severe injury. Turn off disconnect power before opening the enclosure, and confirm zero voltage with an approved tester. My own troubleshooting assumption can be wrong; a failed capacitor or compressor may create similar symptoms. A licensed HVAC technician should verify the circuit under safe testing procedures.

Step 1: Check Breakers, Disconnects, Fuses, and the 24-Volt Control Signal

Why Is My Air Conditioner Contactor Not Working?

Before replacing the contactor, verify that power actually reaches the unit. Turn off the thermostat, then inspect the main breaker and outdoor disconnect. Look for a tripped breaker, a missing pullout, or a visibly damaged fuse. Do not rely on appearance alone. A fuse can fail internally while its glass still looks normal. The U.S. Department of Energy reports that air conditioning uses about 6% of all U.S. electricity, so safe electrical testing matters during every service call.

A qualified technician should test voltage with an approved meter, not just listen for a hum. Power is typically measured across the contactor’s line terminals and load terminals.

Then check the low-voltage circuit. Most residential systems use approximately 24 volts from the transformer and thermostat. With a cooling call active, measure between the control terminals. Little or no voltage may point to a blown low-voltage fuse, an open safety switch, a failed transformer, or damaged wiring.

A quiet coil is a clue. It is not proof.

I have seen technicians replace a contactor too quickly, only to find a loose thermostat wire. I would also question a normal-looking breaker after moisture exposure or repeated trips. The U.S. Energy Information Administration’s residential energy reports show cooling is a major household electricity load, but inefficient repairs can add avoidable cost.

Shut off power before touching terminals, and let a licensed professional handle live-voltage testing.

The National Electrical Code emphasizes proper overcurrent protection and safe equipment disconnecting procedures.

Step 2: Test Contactor Coil Voltage, Resistance, and Thermostat Wiring

When an air conditioner contactor will not pull in, test the coil before replacing parts. Shut off power at the disconnect and verify zero voltage. During a cooling call, measure voltage across the contactor coil terminals. Many residential systems use about 24 VAC, but always follow the equipment nameplate and service data. No voltage suggests thermostat wiring, a low-voltage fuse, transformer, float switch, or control issue. U.S. Department of Energy guidance shows heating and cooling can consume nearly half of a typical home’s energy, so a small control fault can cause noticeable discomfort and cost.

With power removed, disconnect at least one coil wire. Measure resistance across the coil terminals. Infinite resistance usually indicates an open coil. A near-zero reading may indicate a shorted coil. Neither result replaces the manufacturer’s specified range. Check thermostat wiring carefully: the cooling signal commonly travels through the Y circuit, while the common wire completes the 24-volt path. Loose terminals can look acceptable but fail under vibration. I would not treat one meter reading as proof. EIA’s Residential Energy Consumption Survey reports that air-conditioning use is widespread in U.S. homes, making accurate troubleshooting more valuable than guesswork.

Tips: Photograph wire positions first. Test voltage between the correct terminals. Never measure resistance on an energized circuit. If voltage is missing, trace the circuit backward from the coil. A qualified technician should handle live testing, especially when readings seem inconsistent.

Step 3: Inspect Pitted Contacts, Coil Failure, and Mechanical Binding

When an air conditioner contactor stops working, inspect the contact surfaces before replacing parts. Turn off power at the disconnect and verify it with a rated meter. Never trust a silent unit alone. Pitted contacts look rough, blackened, or uneven. They may create heat, buzzing, or intermittent cooling. Light surface discoloration is not always a failure, but deep craters usually justify replacement. Filing the contacts can temporarily improve operation, yet it often removes protective material and hides the real problem.

Check the contactor coil for visible damage, a burnt smell, or loose terminals. With power safely isolated, measure coil resistance according to the equipment service data. An open reading suggests coil failure, while an unusually low reading may indicate a shorted coil. Voltage should also be tested at the coil during a cooling call by a qualified technician. Correct voltage with no movement points toward the coil. No control voltage points elsewhere.

Mechanical binding is easy to miss. Press the armature gently only when power is disconnected. It should move smoothly and return without scraping. Rust, insects, bent parts, or debris can hold it open. Listen for a harsh hum. That sound may indicate weak voltage or a failing coil, not merely dirty contacts. I have seen a contactor replaced when a loose wire caused the symptom. A careful inspection prevents that expensive mistake. Still, diagnosing live electrical equipment carries serious risk, so uncertain homeowners should stop and call a licensed professional.

Why Is My Air Conditioner Contactor Not Working? - Step 3: Inspect Pitted Contacts, Coil Failure, and Mechanical Binding

Contactor Inspection and Troubleshooting Data
Inspection Area Typical Condition or Measurement Visible or Operational Symptoms Recommended Test Likely Interpretation Corrective Action
Contact surfaces Contacts should be relatively smooth, aligned, and free from heavy oxidation, craters, or deep material loss. Indoor blower may run while the outdoor compressor or fan does not start; buzzing or intermittent operation may occur. Turn off power, verify the circuit is de-energized, and visually inspect the contact faces. Do not rely on appearance alone; check voltage across the load terminals during operation. Dark discoloration can be normal after use, but deep pitting, welding, or severe erosion can prevent reliable current flow. Replace the contactor when contacts are badly pitted, welded, misaligned, or excessively worn. Do not file heavily damaged contacts as a permanent repair.
Contactor coil Many residential air-conditioning systems use a low-voltage control circuit near 24 VAC, but the coil rating must match the equipment nameplate and wiring diagram. The contactor does not pull in, pulls in weakly, chatters, or drops out as the system calls for cooling. With a cooling call present, measure voltage directly across the coil terminals. Compare the reading with the rated coil voltage. Disconnect power before checking coil resistance. No or low control voltage indicates a possible thermostat, safety-control, wiring, or transformer problem. Correct voltage with no movement suggests an open or damaged coil. Replace a failed coil or the complete contactor assembly with a component having the correct coil voltage, current rating, and configuration.
Coil resistance Resistance varies by coil design and temperature; there is no single universal resistance value for every contactor. A meter may show OL/open circuit, an unusually low reading, or a reading that changes sharply when the coil is moved or heated. Isolate the coil from the control circuit and measure resistance across its terminals. Use the manufacturer’s service data or a known-good matching component for comparison. OL generally indicates an open coil. Very low resistance may indicate a shorted coil, but the specified value must be confirmed for the particular component. Replace the coil or contactor if resistance is outside the documented specification or if the coil shows heat damage or insulation failure.
Armature movement The movable armature should travel smoothly and return freely when the coil is de-energized. Chattering, humming, delayed engagement, partial contact closure, or a contactor that remains engaged after the call ends. With power isolated, press and release the armature carefully. Check for dirt, rust, bent parts, loose hardware, or physical obstruction. Mechanical binding can keep contacts from closing fully, causing arcing, overheating, and premature contact wear. Replace the contactor if the mechanism is bent, heavily corroded, loose, or cannot move freely. Avoid lubricating electrical contactor mechanisms unless specifically approved by the service documentation.
Contact closure When energized, the main contacts should close firmly with minimal electrical resistance. Compressor or condenser fan receives low voltage, starts intermittently, overheats, or trips a protective device. During a valid cooling call, measure line voltage entering and leaving the contactor. A substantial voltage drop across closed contacts indicates excessive contact resistance. Voltage present on the line side but missing or significantly reduced on the load side points to burned, pitted, misaligned, or incompletely closed contacts. De-energize the equipment and replace the contactor if the contacts do not provide a firm, low-resistance connection.
Contactor chatter A properly energized contactor should remain stable rather than repeatedly opening and closing. Rapid clicking, visible vibration, transformer hum, flickering operation, or repeated compressor start attempts. Measure coil voltage while the contactor is chattering. Inspect low-voltage connections, control wiring, safety switches, and the transformer output. Unstable coil voltage may indicate a control-circuit fault. Correct voltage with mechanical vibration may indicate a weak coil, damaged armature, or contamination. Repair the control circuit when voltage is unstable; replace the contactor when the coil or mechanical assembly is defective.
Terminal condition Terminals should be tight, clean, and free from heat discoloration or melted insulation. Burning odor, hot wiring, intermittent cooling, discolored terminals, or nuisance tripping. After disconnecting power, inspect terminal screws, wire ends, insulation, and conductor size. Check for overheating or looseness. Loose connections increase resistance and heat, which can damage contacts, terminals, and conductors. Repair damaged wiring, use correctly rated terminals, and torque connections according to the equipment or component specifications.

Safety note: Air-conditioning contactors may contain both hazardous line voltage and low-voltage control wiring. Disconnect electrical power, verify the absence of voltage with a properly rated meter, and use qualified service procedures before inspecting or replacing a contactor.

Step 4: Verify Capacitor, Pressure Switch, and Low-Voltage Safety Controls

Why Is My Air Conditioner Contactor Not Working?

Step 4: Verify Capacitor, Pressure Switch, and Low-Voltage Safety Controls

Before testing, shut off the disconnect and verify zero voltage with a meter. Do not bypass a safety switch. A non-working contactor may receive no coil voltage because a pressure switch or control board has opened the circuit. Check the capacitor’s microfarad reading against its nameplate tolerance. A weak capacitor can cause humming, hard starts, or contactor chatter, but it may not be the original fault.

Trace the low-voltage circuit from the thermostat to the contactor coil. Measure voltage across the coil during a cooling call. A reading near the rated control voltage suggests a failed contactor coil. No reading points upstream. Inspect loose spade terminals, rubbed wires, and water near the outdoor control compartment. Small details matter.

The U.S. Department of Energy reports that air conditioning uses about 6% of U.S. electricity and costs consumers over $29 billion annually. The International Energy Agency’s Future of Cooling report projects global cooling energy demand could more than triple by 2050 without stronger efficiency measures. Accurate diagnosis protects equipment and reduces wasted power. A common field mistake is replacing the contactor immediately. I would pause there. A pressure switch that opens repeatedly may indicate airflow restriction, refrigerant imbalance, or a dirty coil. Never force the system to run. Record voltage, capacitor readings, switch status, and outdoor temperature before replacing parts.

Why Is My Air Conditioner Contactor Not Working?

Step 4: Verify Capacitor, Pressure Switch, and Low-Voltage Safety Controls

This example diagnostic profile compares common verification results with their expected reference points. A run capacitor reading of 96.8% of its rated capacitance is generally within a typical ±6% tolerance. The 24.3 VAC control reading is close to the nominal 24 VAC control voltage. The pressure switch is shown as closed, indicating that the safety circuit is permitting contactor operation under the measured conditions. Always compare pressure-switch operation and capacitor tolerance with the equipment manufacturer’s specifications.